Just an update on what is happening in my gaming word at the moment.
I am currently painting my DBA Pictish army - it is taking longer than expected, due to a little thing called life demanding my time! I have finished the 2 x2LH, 3 x 2Ps, 1 x 3Cv (gen) and 1 x 4Sp (gen). So just 6 spears to go, plus a light chariot to cover the earlier option. Looking forward to fielding these little fellows against my other Dark Age armies - Saxons, Vikings, Wesh.
For my birthday recently I also got a number of figures for a 15/18mm set of armies to recreate the Battle of the Five Armies from The Hobbit. I am using the HoTT rules. I will put up a separate post to discuss the composition of the armies concerned. The figures are mostly Eureka fantasy minis.
This weekend I am traveling to the Sydney Southern Battle Gamers Historical matched pairs tournament (http://www.southernbattlegamers.org/index.php?option=com_content&view=article&id=6:2009-dba&catid=2:events&Itemid=3). I am taking my Vikings III/40a and Welsh III/19a. An interesting matching of blades v warband - superior strength of arms v quick kill. This wil be my first tournament, so I am pretty excited about how it might pan out. I will keep you updated.
A record of the experiences and thoughts of a miniature wargame player - at this stage DBA and Crossfire.
Tuesday, August 11, 2009
Sunday, July 12, 2009
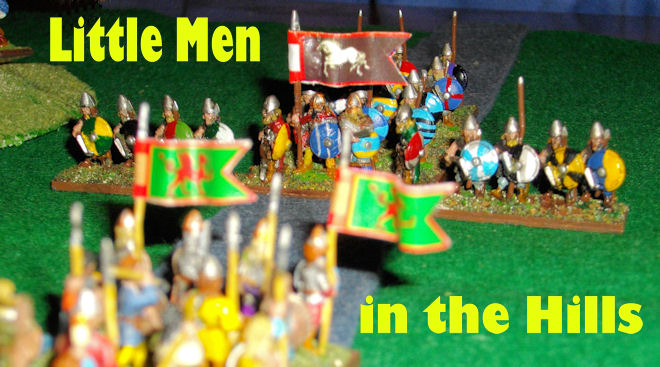
Tried "biggish" battle
It's been great of late. At work there are 4 of us al learning DBA together. Playing games during our lunch break. We keep a timer on the moves to ensure we get a result in time. This week we decided to try out a "biggish" battle - 2 v 2.
It was an interesting experience. We played totally non historical teams - Later Carthage (Commender in Chief) plus Patrician Romans vs Later Visigoths (Commander in Chief) plus Dark Age Welsh. We also tried to implement the timer for the game as well.
The first observation was a total feeling of lack of control - normally in a game of DBA I generally feel some level of control over what is going on. In the big battle I wasn't feeling that way - there was so much going on and with the timer running I didn't feel like I had tiome to comprehend what was going on.
On the tactical side, both armies had the same aim - try to demoralise the commander in chief's command. For us, we isolated 4 of CinC elements on the edge of the board, and with spears v warband we had quick kills on the opposition. But the bigger space on the battle field made it difficult to get the general in position to get enough pips to be able to use the warband effectively. We would get there but it would take time.
But then we lost our centre as the Roman mounted troops ripped through the Visigoths. That demoralised our CinC (in one bound we lost 3 elements of the CinC) and from there it was always going to be difficult. With the warband spread out, it was difficult because pips were double for some of the key elements.
All in all an interesting experience. I wouldn't recommend a timer on the moves for this kind of battle. To be successful at this form of the game I would need to learn to use the distance from my general better. I am sure we will give it a better go at some stage.
Wednesday, July 1, 2009
I am a slacker...
Well I have been busy with DBA but you wouldn't know it, by viewing this blog. Well here is a bit about what I have been up to.
First up, on the painting front. I have painted my second army - Middle Anglo Saxons. After painting Vikings, Saxons was the obvious place to visit next. I will post them up soon - once I photograph them. At the moment I am in the process of painting some Picts - they will prove a fine addition to my other Dark Age British armies. Also I purchased a Dark Age Welsh army off Ebay. A nice paint job on them too!
Once I have the Picts done, that will make it 4 Dark Ages armies, and my thoughts turn to which next. Happy to hear any suggestions.
Sunday, March 1, 2009
My first painted army - III/40a
A while back (years we are talking) I bought myself a copy of the DBA rules (v1.1 I think). I had been told about this game and thoguht it would be good to get into. And so once I had the rules I thoughtit best to get myself some figures...and so I made the choice of Vikings. I knew little of them, but they seemed interesting and they had a lot of blades and for all I knew, blades seemed to have the best "pluses". It was dumb and naive, but it is what made me part with my cash.


Here is the general's element:

The camp and guard with bow:

Most of the figures are Tin Soldier I believe. I had to add a few extras and they are Museum.

And after all those blades, you can always use an element of psoloi

I had enough figures to put the options together for the extra units for the 40 b option so here are the bows and warband (my personal favourite).
And those figures sat in a box for years as I almost forgot about them. Late 2008 rolled around and I finally got to painting up my first DBA army...and here are the results...
Here are all the scandanavian lads:
Here are all the scandanavian lads:


Here is the general's element:

The camp and guard with bow:

Most of the figures are Tin Soldier I believe. I had to add a few extras and they are Museum.
Here are one of the swords blade elements:

And after all those blades, you can always use an element of psoloi

I had enough figures to put the options together for the extra units for the 40 b option so here are the bows and warband (my personal favourite).


So there you have it. My first effort in painting a DBA army.
My next job is to touch up a Feudal English army I bought on EBay.
Sunday, January 25, 2009
Picts v Welsh
OK So they weren't historical opponents, but they were both around in the same era just on either end of the British Isles. I thought it would be an interesting match up with the Pictish shield wall of spears facing 9 elements of Welsh warband in some difficult terrain. I commanded the Picts and hoped to make use of the mounted troops to work the flanks, and withstand the warband's quick kill against spears. We were both new DBA players so we would probably make a few blunders along the way.
 Foolishly Gwynn's first line of warband arrived ahead of their support and so we moved forward taking our left into the bad going to take advantage of their isolation. We forced both sides of their wall back but they bravely held our centre assault.


And so it began....
With two steep hills in the centre of the board, the Welsh general (we will call him Gwynn) deployed his forces behind him, clearly hoping to use the bad going to his advantage. I spread out the Pictish shield wall and thought to get them to the base of the hills and then send the light horse and cavalry around or over the hill to contact the flank. I didn't want to give away too much early and so I would only send one of the mounted troops around early and then dispatch the others once their attention was drawn by the shield wall.
Early on Gwynn struggled to get his forces to remain in formation as he found PIPs hard to come by. In contrast my Picts were patiently waiting at thebase of the hills for the enemy to arrive. We had positioned one LH group on top of the hill while the other sat at the back of the hills ready to attack when needed.
Foolishly Gwynn's first line of warband arrived ahead of their support and so we moved forward taking our left into the bad going to take advantage of their isolation. We forced both sides of their wall back but they bravely held our centre assault. Eventually we drove them back and their support caught up with them. I pulled the shield wall back out of the bad going and waited for their assault force arrive. An abundance of PIPs and his failing to pay any attention to my light horse men behind the hill, saw me dispatch them across the river (which was not flowing well and so easy to cross) and towards his camp. My light horse troops made short work of the Welsh camp and turned back to rejoin the main battle, perhaps getting the chance to linger at the the rear of his line and give me the chance to kill off a few warband and take the victory.
My shield wall was holding its own against the Welsh warband, forcing them back into the hills time and time again. Each time they returned to the battle and we would send them back into the hills. Finally Gwynn started to get some help in the area of command PIPs and he was able to bring his psoloi into the fray on my right. I was concerned. We were holding the centre of the battlefield, dispatching their warband to the hills consistently but eventually the quick kill would happen, and his manueuvers to my right would give him the chance to gte outside me. I had my extra psoloi I could dispatch to secure the right but I thought I might need to use the general as well, so I started to send the cavalry. But suddenly the PIPs started to dry up for me. I could only bolster the right and my light horse sitting behind his troops would have to wait until I had the PIPs to spend.
Suddenly it all happened on my right. My psoloi arrrived too late and he got his first victory over my spears, taking the right side of my shield wall. Our skirmishers faced off while he then contacted the side of my now shortened right with his warband, isolating the spears there. Their time was numbered and my 2-0 advantage and the control I had maintained in the centre was now looking shakey. And still I couldn't get enought PIPs to bring my light horse back. I saw a chance though in the centre, but it would mean puching forward and taking my left into the bad going to try to press the left and perhaps get the chance to use my light horse on the hill.
Bad news though. I lost my second element of spears and we were now locked at 2-2 and the press into the centre didn't pay dividends. My general was finding it slow going to getting to the right to bolster the defence on that side and still the LH behind their lines remained stranded. The next bound saw my skirmishers on the right dispatch his skirmishers and I needed to take one more to win. My general arrived and forced his warband back again
But then things went from bad to worse. Gywnn sent his reserv ed warband into the hills to chase my LH away. And my general had actually helped him. The forced recoil allowed him to join the line and then have one final push of his warband out of the hills again in an attempt to break my shield wall.
And this time we broke, and it was disasterous. All three of my spears were quick killed and the two supporting psoloi were eliminated as well. I had gone from leading 3-2 to losing 7-3 in one bound. My army was decimated and it was all over. Gwynn had his first victory in DBA and I was left searching for my maiden win.
LESSONS LEARNT:
Honestly, I am not too sure of what else I could have done in this battle and would gladly take any advice. In my opinion, it was the lack of PIPs that killed me. I was constantly pushing his warband back into the hills, and if I could have gotten the LH in around behind him to impede his recoil it could have been over early.
Monday, January 19, 2009
Father v Son
Whilst learning to play DBA myself and prepare my first painted army to take the field I have been trying to introduce a few others to DBA. One of the first I have tried to teach a bit about is my son, Isaac, who is 7. This is a battle report of the clash we had one day over the Christmas break. My aim was to show him the basics of the game and help him understand some basics of tactics and planning.
The armies were not historical ones, just whatever cardboard bases I had cut out and labelled and could lay my hands on. So here is the order of battle:
My marauders:
1 x 3Cv (Gen)
2 x 3Cv
1 x 2LH
4 x 4Pk
2 x 3Ax
2 x 2Ps
Isaac's army
1 x 3Cv (Gen)
4 x 3Cv
1 x 2LH
2 x 3Bw
4 x 4Bd
I let Isaac choose the terrain and layout of the battle field. Below is a simple representation of the map. The white squares show the two camps…mine at the top and his at the bottom.
Before we started I asked my son what his plan was (I wasn't going to use it against him but wanted to see that he was thinking about tactics). His plan was simple enough. The bows were to cross the river and head to the hills, the mounted troops to cross the river and stretch out to engage my mounted units in the plain and have his blades make their way up the road to cross the bridge and attack my right flank. I was satisfied that he had thought about what he wanted.
And so we took to the field of battle.
The pips were tight early on for both sides. I managed to advance my pikes well enough. I wanted to catch his blades as close to river as I could, so I let them have their head and charge up the road. I could advance the cavalry a little but the pips were coming in 1s and I didn't get to be in line with the hill before we would find trouble. We just couldn't get enough command pips to move the reserve forces ahead to support any of the troops.
Isaac forded the river with ease, finding it offering no impediement to his forces. The bows made it to the crest of the hill quickly enough and he positioned one element at the fron o the hill and the other ar the rear. His cavalry too made the journey easy enough and were well positioned befside the hill to engage my forces. His blades thugh had issues with getting orders right and struggled to get going (the curse of the low command pips), and only just managed to reach the other side of the bridge before coming face to face with the advancing pikes. His blades managed to spread two units across for a small front before they were engaged.
And so combat came. Isaac's bows on the front of the hill did well, nailing my general's cavalry and driving them back twice under a hail of arrows. He then engaged my line of cavalry and LH and at first all held their ground.
My pikes smashed into his blades and there was some movement, I forced one of his blades back to the river bank, but they were not done. The battle on the bridge was fierce and our small lines exchanged momentum, and soon it was clear that this part of the battle was probably fast heading to a stalemate. Finally the dice spoke and one of his blades were crushed and I now held an overlap on his forces on the bridge. He couldn't get off the bridge and I was able to hold him off, but I couldn't get the killer blow.
In the meanwhile on the plain, I had some luck in the centre on the battle field and I broke his line of mounted troops. The cavalry next to his general broke and were crushed. But his bows continued to pester my general who was recoiling every time he made contact with the opposing cavalry (the dice was cursed I tell you!) and then when he wasn't enganged he was peppered by the bows in the hills. I didn't want to charge them up the hill to take on the bows and so I was struggling to make the best use of my general. My auxillia had started to move and I thought that they might be able to prove the difference if they could get to the hill and take out the bows. But again after a start the pips dried up and I was forced to use up my quota each turn to keep my line straight with the cavalry.
It was now 2 - 0 to me and I was hopeful I could get to those bows to silence them.
But then the tide turned suddenly and dramatically. While my command pips were drying up, Isaac's were starting to flow freely. His cavalry line now in two groups enganed my line and he got hold of my LH and swept them away. My left flank was now vulnerable and he wrapped his LH and one Cav unit around the side and hit my flank. Another Cav folded under the onslaught from the left and suddenly we were at 2 units each.
Back on the bridge Isaac's blades again sucummbed to my pikes and I had the chance to press the advanatage and try to get a win, because I was getting the sort of sinking feeling on my left. He had two blades elements left but I would have to forgo my overlap and press onto the bridge to take him on. (It was 3-2 to me at this point and that was the plan).
In the plain I thought it best to divert my general out of the range of the bows and towards the attack on the flank. And then the pain came….
Isaac got a great roll of 6 for his pips. He pressed his blades forward to engage me on the bridge (still giving me the overlap I thought he had made a mistake that would give me the game). Then his rear bows unit came down from the hill and hit my pikes flank…I just didn't see that coming. He got a good roll and forced the recoil, and with the flank contact destroyed my first rank of pikes. 3 elements lost each now and again I understimated the speed of the LH unit on my flank. My general was met head on by the opposing cavalry as the LH wrapped around the flank, and again the dice spoke. My general fell and the army was routed. Isaac had won a tight battle.
LESSONS LEARNT:
I think it is useful to look at each battle and to understand what I can learn from the experience.
First up, was the effectiveness of bows against mounted units. I knew they were effective but thought it would be OK with my general being the target.
Second, never underestimate the importance of command pips. I was starved all game to be able to do what I wanted to do, leaving my reserve foreces helplessly watching the battle unfold before their eyes.
Third, I totally underestimated the usefulness of LH on the flank, this was probably the killer blow for me.
Fourth, I need to stay on the lookout for the unprotected flanks. If not for those bows racing down out of the hills my pikes could have won the right.
Finally, I reacted too slowly to a few key moments. I should have moved my general out of the bow fire earlier and sured up one of the flanks.
Lots learnt and plent of fun had, and I think I might just have hooked my son.
The armies were not historical ones, just whatever cardboard bases I had cut out and labelled and could lay my hands on. So here is the order of battle:
My marauders:
1 x 3Cv (Gen)
2 x 3Cv
1 x 2LH
4 x 4Pk
2 x 3Ax
2 x 2Ps
Isaac's army
1 x 3Cv (Gen)
4 x 3Cv
1 x 2LH
2 x 3Bw
4 x 4Bd
I let Isaac choose the terrain and layout of the battle field. Below is a simple representation of the map. The white squares show the two camps…mine at the top and his at the bottom.

I deployed the Cavalry in my centre the the general on the right hand side of that formation and the LH on the far left flank. My pikes formed a column on the road and The auxlia set up between the camp road, encroaching a little into the woods.
Before we started I asked my son what his plan was (I wasn't going to use it against him but wanted to see that he was thinking about tactics). His plan was simple enough. The bows were to cross the river and head to the hills, the mounted troops to cross the river and stretch out to engage my mounted units in the plain and have his blades make their way up the road to cross the bridge and attack my right flank. I was satisfied that he had thought about what he wanted.
And so we took to the field of battle.
The pips were tight early on for both sides. I managed to advance my pikes well enough. I wanted to catch his blades as close to river as I could, so I let them have their head and charge up the road. I could advance the cavalry a little but the pips were coming in 1s and I didn't get to be in line with the hill before we would find trouble. We just couldn't get enough command pips to move the reserve forces ahead to support any of the troops.
Isaac forded the river with ease, finding it offering no impediement to his forces. The bows made it to the crest of the hill quickly enough and he positioned one element at the fron o the hill and the other ar the rear. His cavalry too made the journey easy enough and were well positioned befside the hill to engage my forces. His blades thugh had issues with getting orders right and struggled to get going (the curse of the low command pips), and only just managed to reach the other side of the bridge before coming face to face with the advancing pikes. His blades managed to spread two units across for a small front before they were engaged.
And so combat came. Isaac's bows on the front of the hill did well, nailing my general's cavalry and driving them back twice under a hail of arrows. He then engaged my line of cavalry and LH and at first all held their ground.
My pikes smashed into his blades and there was some movement, I forced one of his blades back to the river bank, but they were not done. The battle on the bridge was fierce and our small lines exchanged momentum, and soon it was clear that this part of the battle was probably fast heading to a stalemate. Finally the dice spoke and one of his blades were crushed and I now held an overlap on his forces on the bridge. He couldn't get off the bridge and I was able to hold him off, but I couldn't get the killer blow.
In the meanwhile on the plain, I had some luck in the centre on the battle field and I broke his line of mounted troops. The cavalry next to his general broke and were crushed. But his bows continued to pester my general who was recoiling every time he made contact with the opposing cavalry (the dice was cursed I tell you!) and then when he wasn't enganged he was peppered by the bows in the hills. I didn't want to charge them up the hill to take on the bows and so I was struggling to make the best use of my general. My auxillia had started to move and I thought that they might be able to prove the difference if they could get to the hill and take out the bows. But again after a start the pips dried up and I was forced to use up my quota each turn to keep my line straight with the cavalry.
It was now 2 - 0 to me and I was hopeful I could get to those bows to silence them.
But then the tide turned suddenly and dramatically. While my command pips were drying up, Isaac's were starting to flow freely. His cavalry line now in two groups enganed my line and he got hold of my LH and swept them away. My left flank was now vulnerable and he wrapped his LH and one Cav unit around the side and hit my flank. Another Cav folded under the onslaught from the left and suddenly we were at 2 units each.
Back on the bridge Isaac's blades again sucummbed to my pikes and I had the chance to press the advanatage and try to get a win, because I was getting the sort of sinking feeling on my left. He had two blades elements left but I would have to forgo my overlap and press onto the bridge to take him on. (It was 3-2 to me at this point and that was the plan).
In the plain I thought it best to divert my general out of the range of the bows and towards the attack on the flank. And then the pain came….
Isaac got a great roll of 6 for his pips. He pressed his blades forward to engage me on the bridge (still giving me the overlap I thought he had made a mistake that would give me the game). Then his rear bows unit came down from the hill and hit my pikes flank…I just didn't see that coming. He got a good roll and forced the recoil, and with the flank contact destroyed my first rank of pikes. 3 elements lost each now and again I understimated the speed of the LH unit on my flank. My general was met head on by the opposing cavalry as the LH wrapped around the flank, and again the dice spoke. My general fell and the army was routed. Isaac had won a tight battle.
LESSONS LEARNT:
I think it is useful to look at each battle and to understand what I can learn from the experience.
First up, was the effectiveness of bows against mounted units. I knew they were effective but thought it would be OK with my general being the target.
Second, never underestimate the importance of command pips. I was starved all game to be able to do what I wanted to do, leaving my reserve foreces helplessly watching the battle unfold before their eyes.
Third, I totally underestimated the usefulness of LH on the flank, this was probably the killer blow for me.
Fourth, I need to stay on the lookout for the unprotected flanks. If not for those bows racing down out of the hills my pikes could have won the right.
Finally, I reacted too slowly to a few key moments. I should have moved my general out of the bow fire earlier and sured up one of the flanks.
Lots learnt and plent of fun had, and I think I might just have hooked my son.
Starting off
Well I begin my DBA journey here on line today. The purpose of this blog is for me to record the battles which I have taken part in. I was to record them to record my learning but also for the sake of having a record of them.
From time to time I may also post pictures of my armies, but to be honest I am fairly scratchy in my painting ability compared to many others.
Anyway, I will get to writing up my first reports.
Cheers.
From time to time I may also post pictures of my armies, but to be honest I am fairly scratchy in my painting ability compared to many others.
Anyway, I will get to writing up my first reports.
Cheers.
Subscribe to:
Posts (Atom)